Using tickets and macros in Intercom
Configure ticket types and build a macro library for handling Fin escalations consistently.
Not every conversation can be resolved in a single chat. When Fin escalates complex issues to your team, some will need extended resolution time, cross-team collaboration, or formal tracking. This lesson covers two tools for handling those situations: tickets for structured issue tracking, and macros for consistent, repeatable responses.
This lesson is part of the Setting up your AI-first helpdesk course.
When a conversation becomes a ticket
Many of the conversations your teammates receive will be best resolved in a straightforward conversation. But others can be more complex, requiring more time to resolve, or input from other teams. That’s where tickets come in.
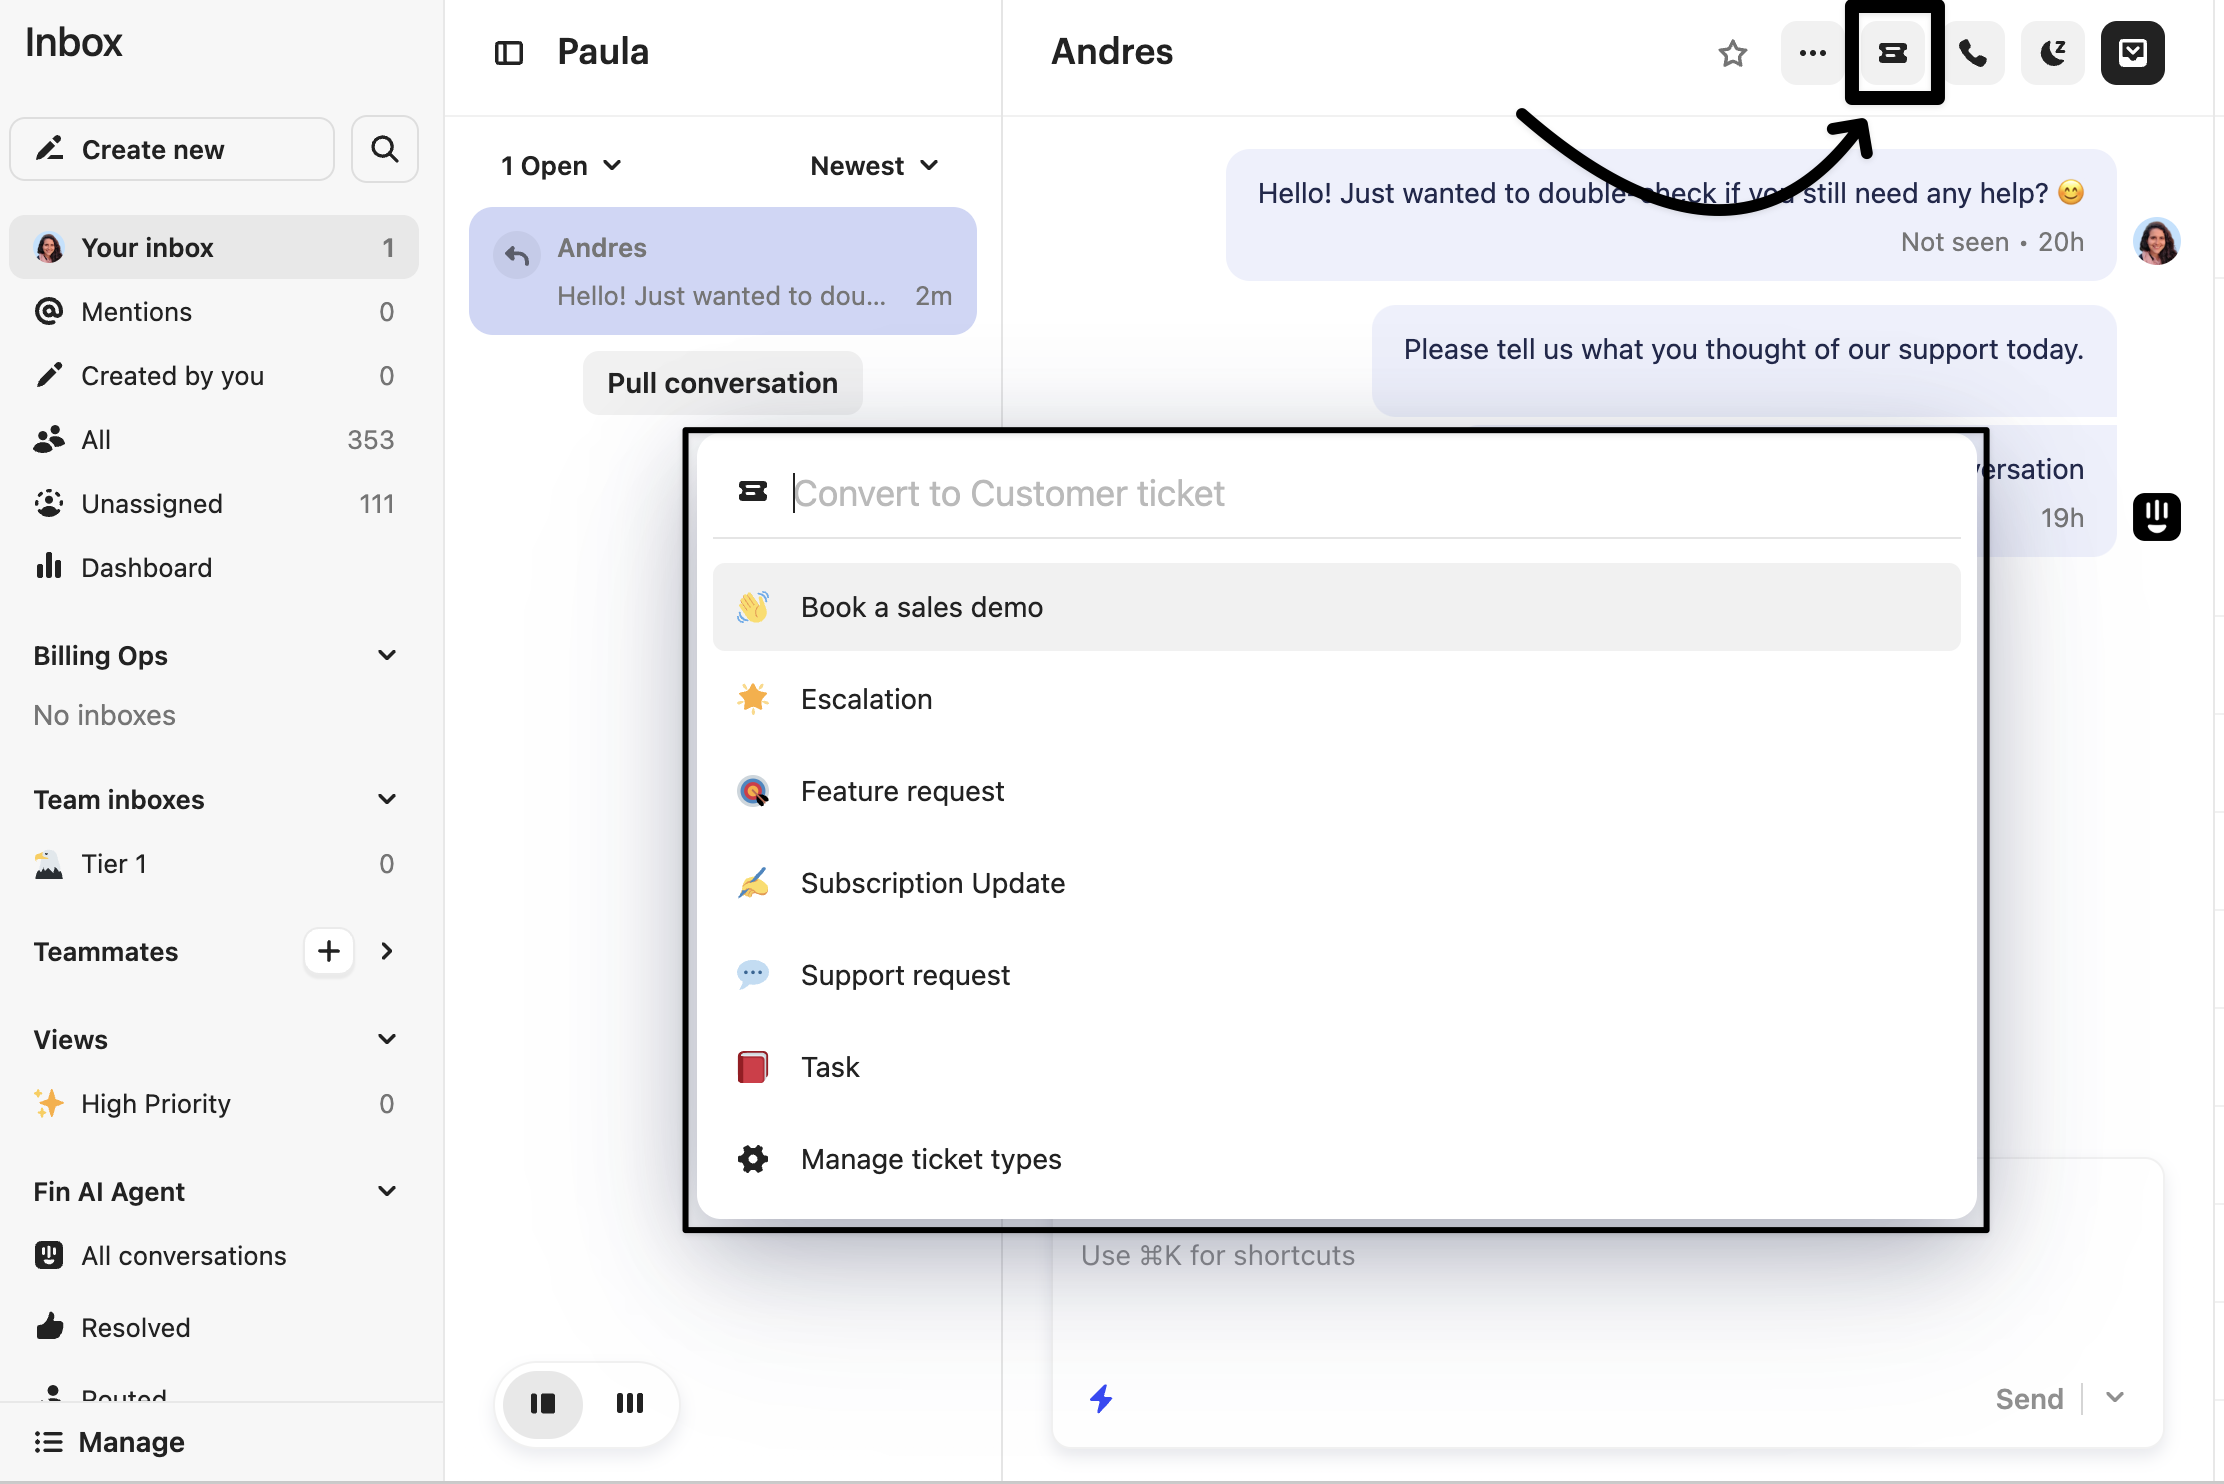
Tickets are reserved for specific situations:
- The issue needs extended resolution time and the customer can’t stay in a live chat
- The work requires cross-team collaboration, such as billing, engineering, or fraud
- The issue is affecting multiple customers simultaneously (a bug or outage)
- The customer needs formal status visibility while work continues asynchronously
In practice: Default to conversations. Convert to a ticket only when one of the conditions above applies.
| Note: Fin can also create tickets automatically via Workflows. |
Ticket categories
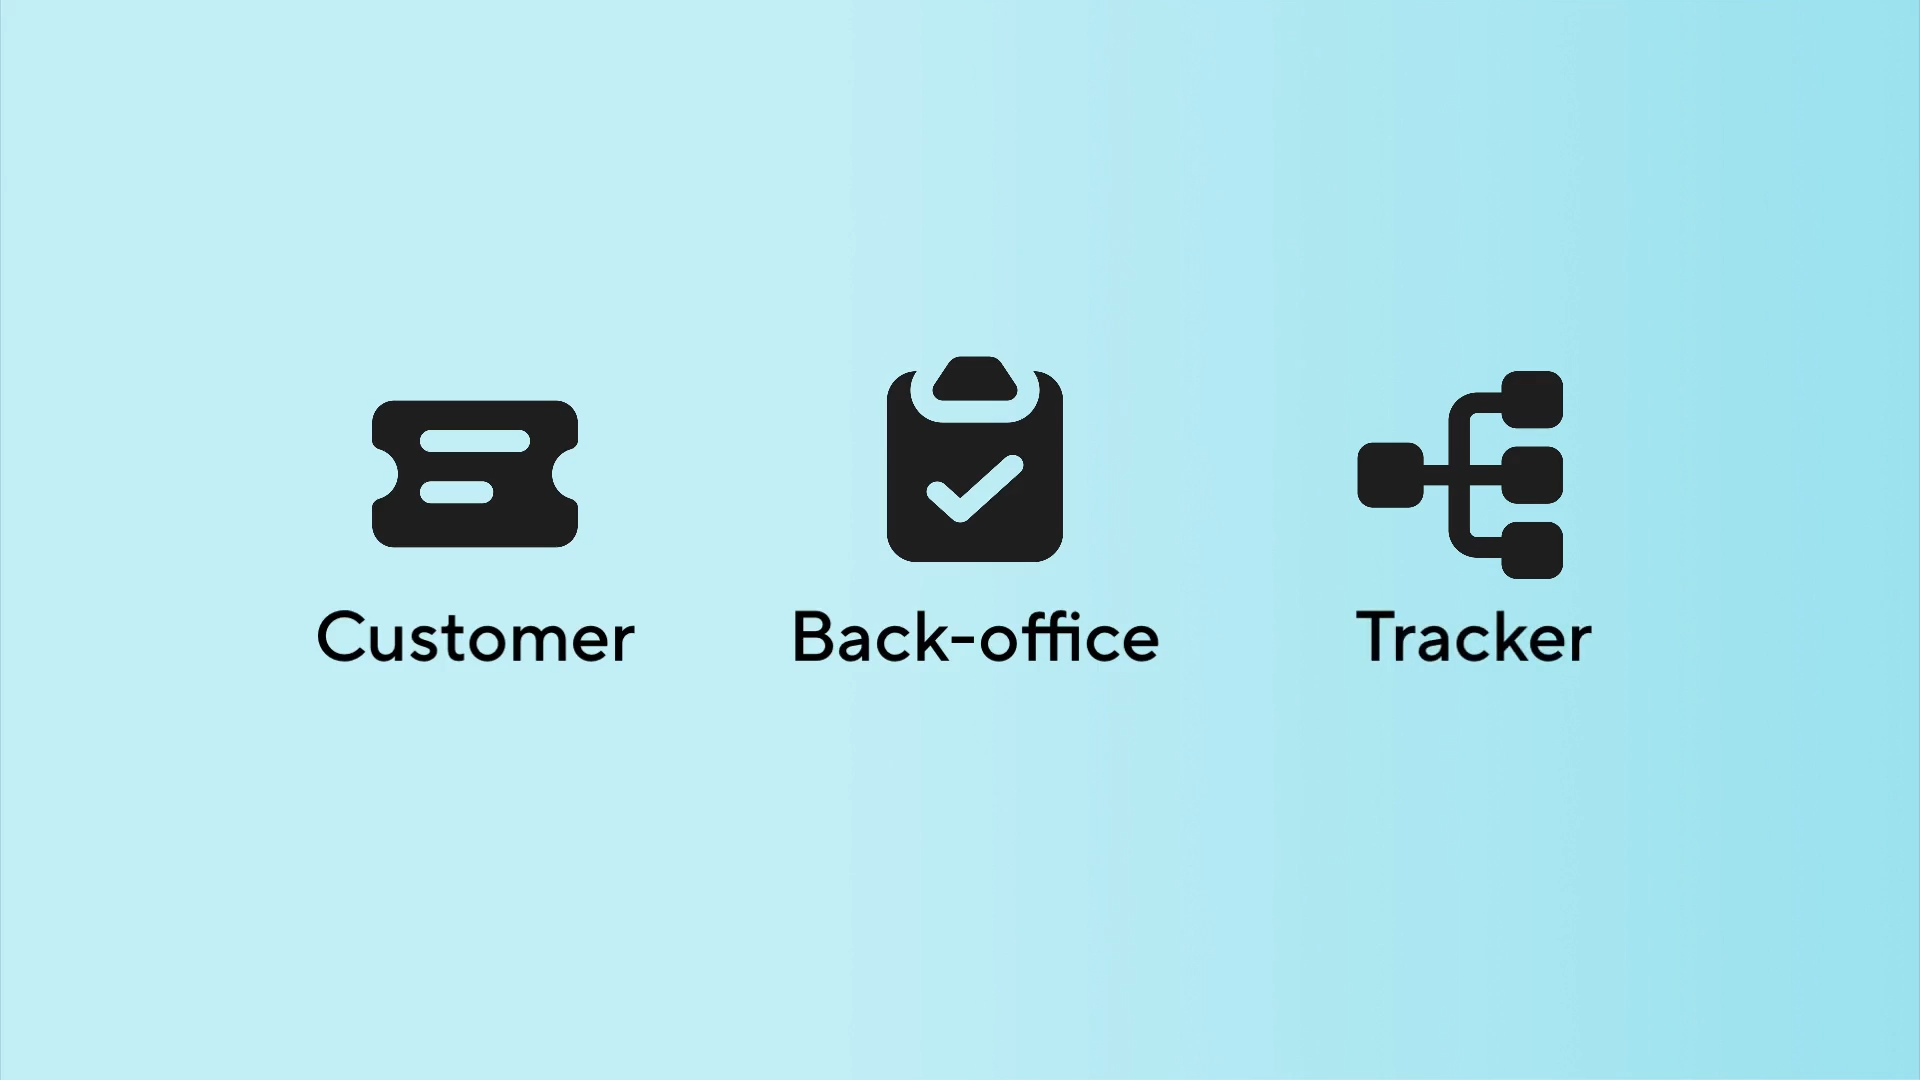
Intercom gives you three ticket categories to work with. Here’s how each fits into your support operation:
- Customer tickets: Async resolution with full customer visibility in the Messenger. Use these when the customer needs to know a case is open and being worked on.
- Back-office tickets: Internal collaboration that the customer never sees directly. These cross-post status updates to the customer’s conversation, so agents can coordinate behind the scenes without losing the customer-facing thread.
| The general rule: If the customer initiated the request and is waiting for an outcome, make it a customer ticket. If the work is happening behind the scenes to support a resolution that gets communicated another way, make it a back-office ticket. |
- Tracker tickets: For issues affecting multiple customers at once, such as bugs or feature requests. Link to an existing tracker ticket from within a conversation so that all affected customers can be updated at once.
Set up your ticket types
Before your team can start creating tickets in the inbox, you first need to create the ticket types you want to use. A ticket type defines the data fields to be captured in the ticket.
You can set up ticket types from Settings > Inbox > Tickets.
Start with a handful of ticket types you know you need: a customer ticket type for billing disputes that the customer can track, a back-office ticket type for security issues, or a tracker ticket type for bugs. You can expand from there once you’ve observed which escalation types actually need ticket-level tracking.
Convert emails to tickets automatically
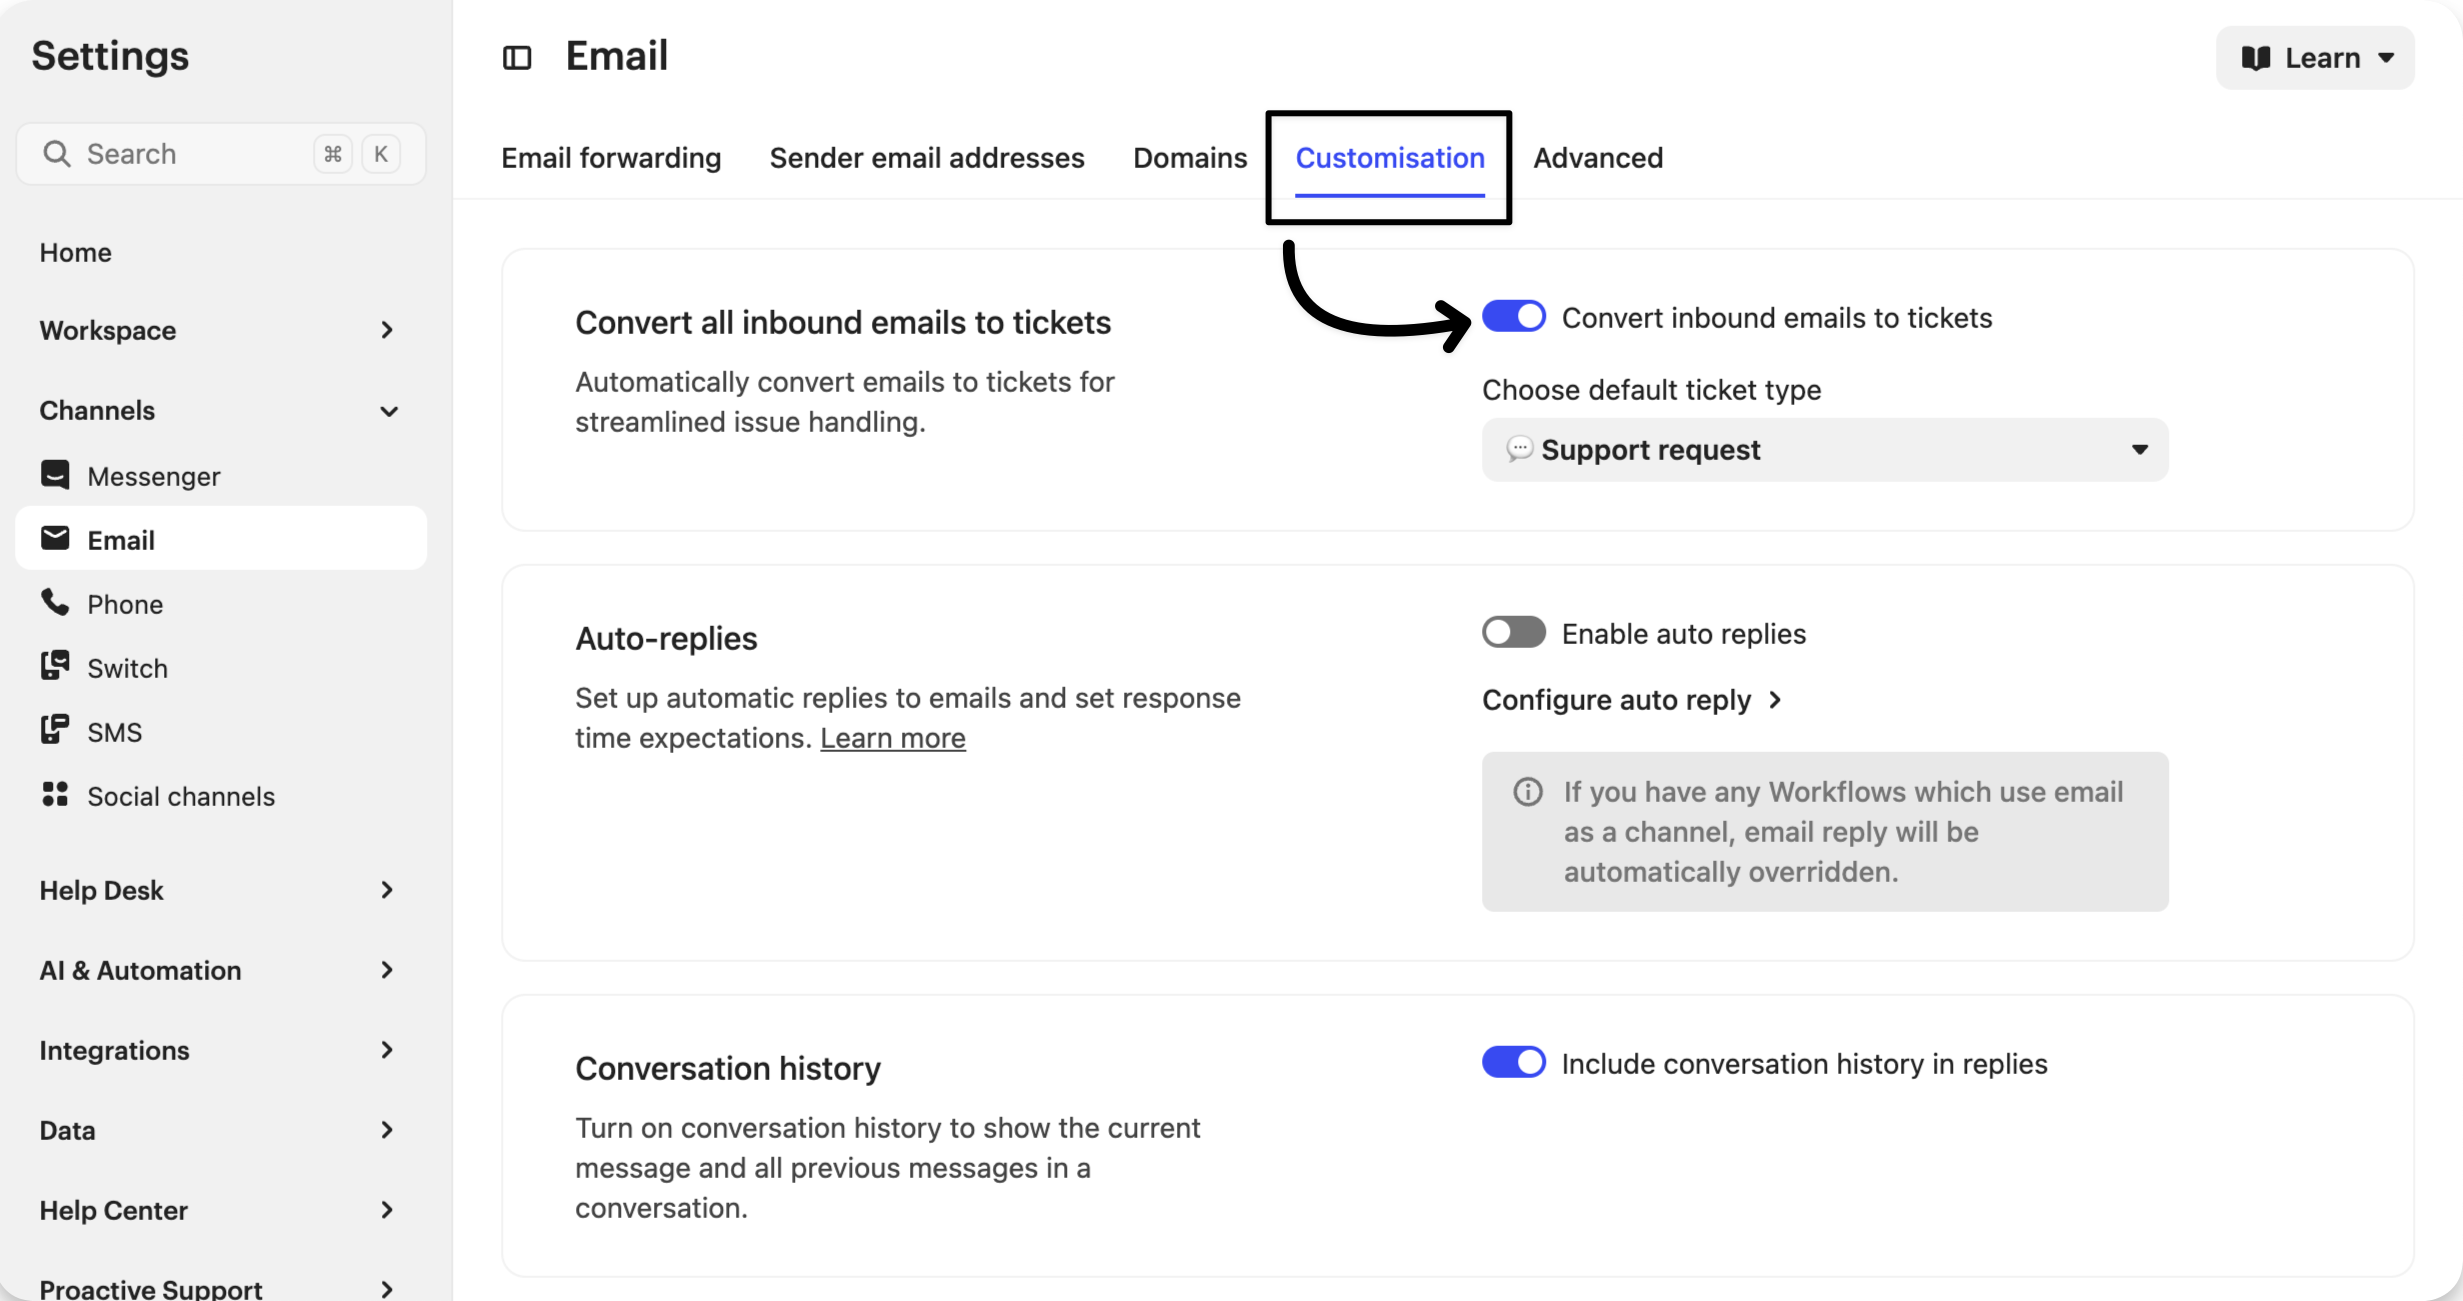
Since replies over email typically take longer than over live chat, it can make sense to convert all inbound emails to customer tickets instead of keeping them as conversations.
To convert all incoming emails to customer tickets, go to Settings > Channels > Email > Email settings and toggle Convert inbound emails to tickets, then choose your ticket type.
Fin can respond to customer tickets the same way it responds to conversations.
Macros
In a traditional, high-volume helpdesk, macros were built for speed, helping teams handle common questions more efficiently.
But when Fin is already resolving your most common queries, the role of macros changes.
In AI-first support, macros become tools for consistency. When Fin escalates a more complex issue, macros help teammates handle it with the same care and precision every time, without missing critical steps or reinventing the wheel.
The customer receives the right information, the right actions are taken, and the correct standards are applied. Think of macros like a surgeon’s checklist: their value isn’t speed, but making sure nothing important gets overlooked.
Building your macro library
Build macros around your top escalation types. For each escalation type, define three things before you write a word of copy:
- When should this macro be used? (What’s the trigger condition an agent would recognize?)
- What does the agent send to the customer? (The reply content)
- What internal actions happen alongside it? (Assign to team, apply a tag, close the conversation, create a back-office ticket)
To create a new macro, go to Settings > Inbox > Macros and select + New macro.
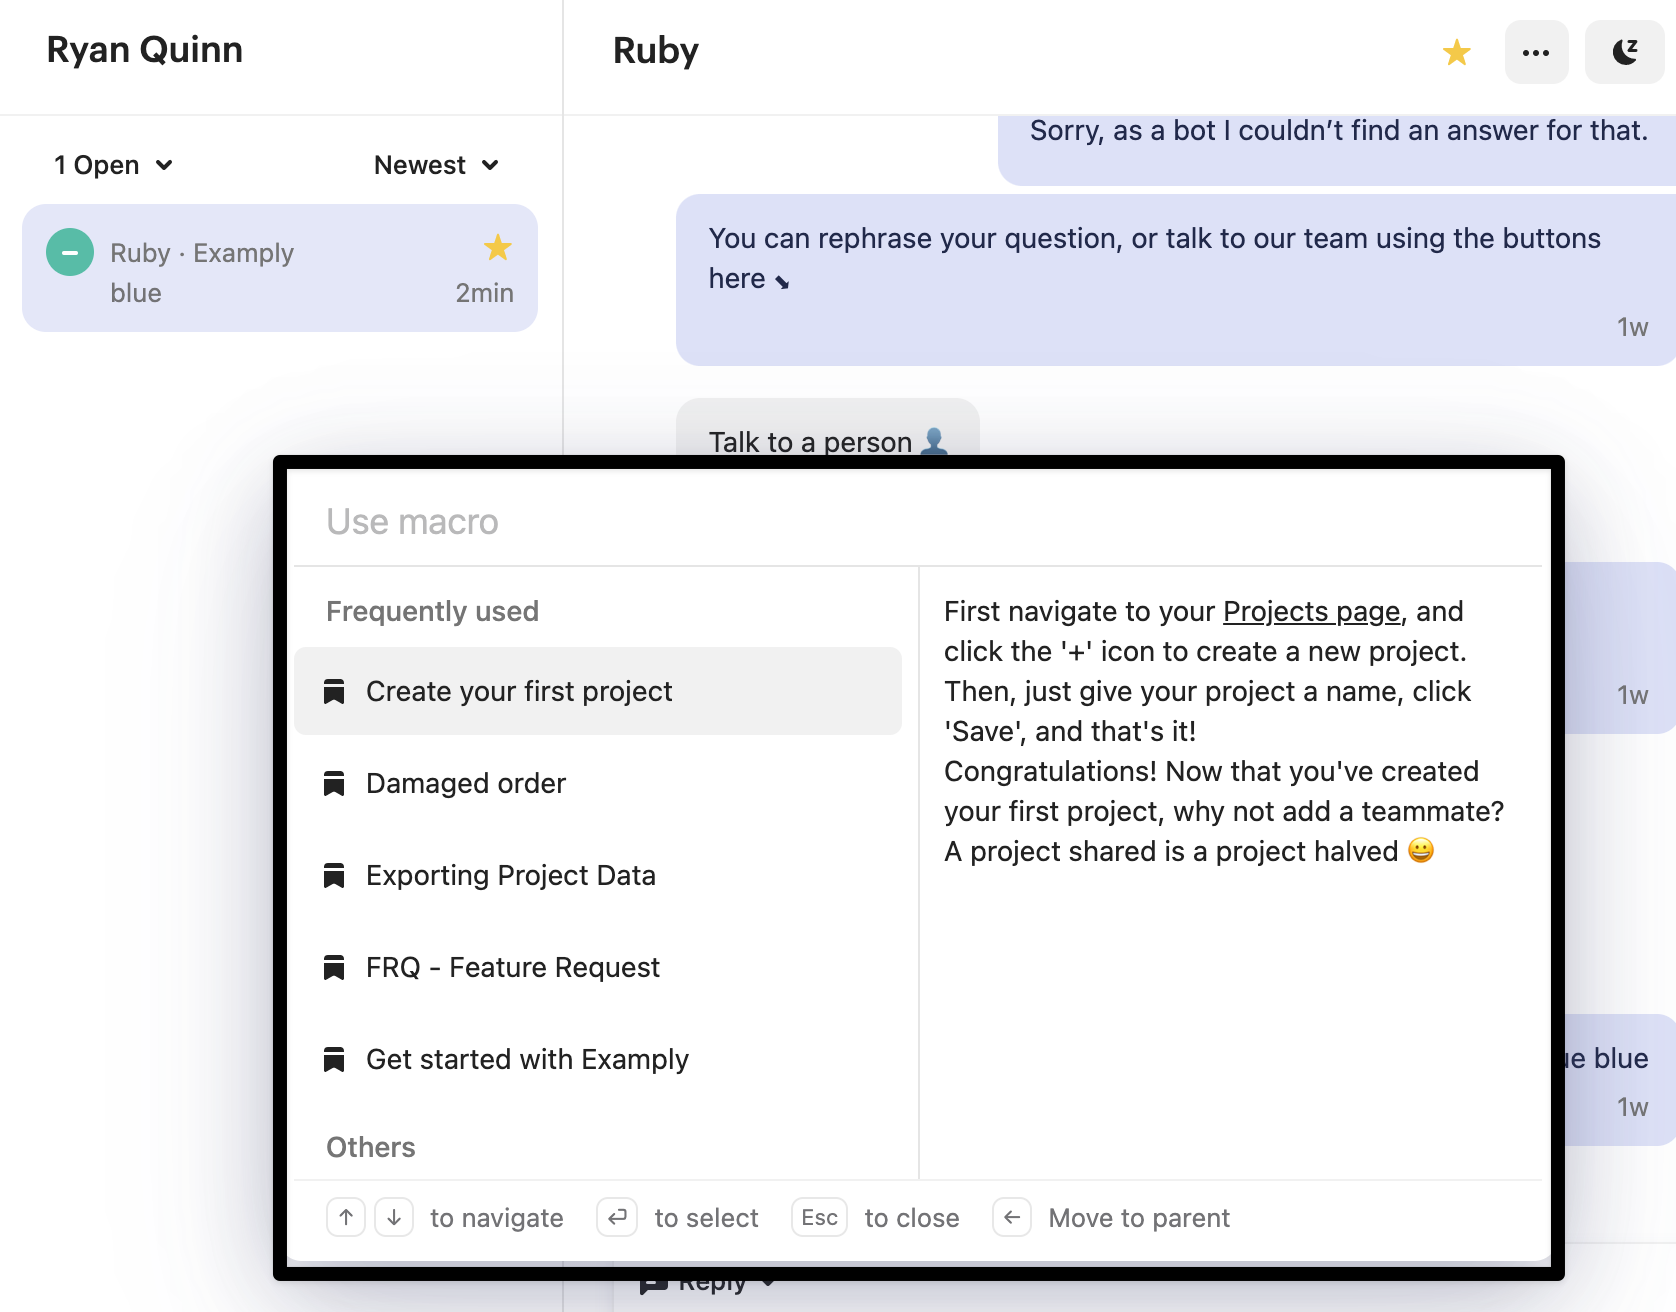
You or your team can also create a macro from inside an active conversation. Press ⌘K and search Create new macro, or use the composer action icon and select Create new macro.
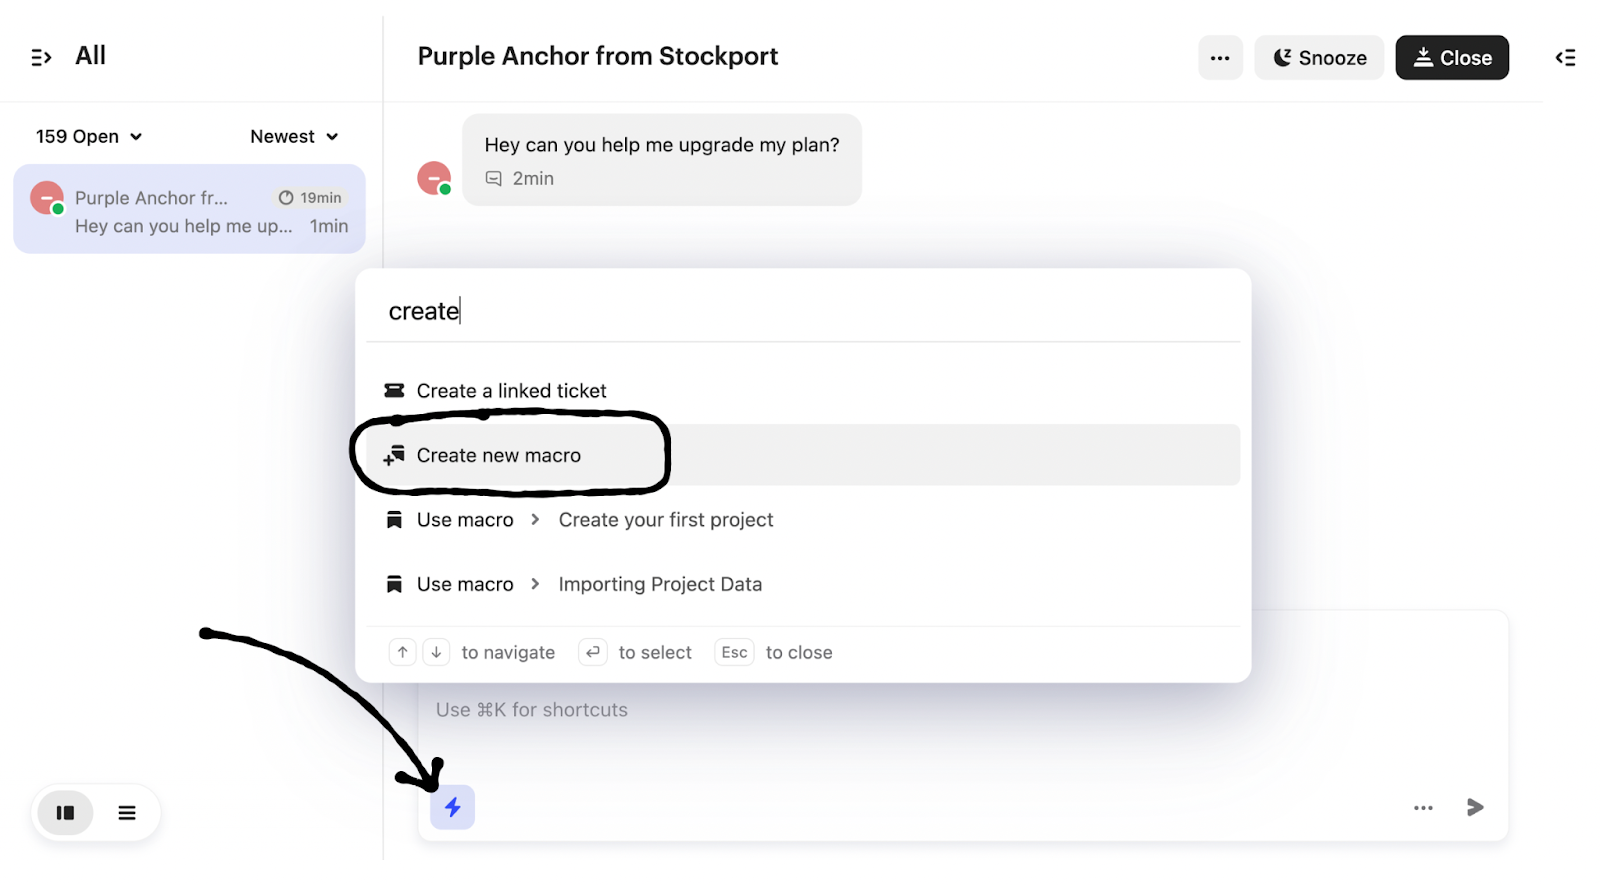
This is useful for creating macros on the fly when you or a teammate writes a reply that’s worth saving for future use.
Using macros in Intercom
Your team can find macros easily by clicking the macros icon in the reply composer, using a backslash \ or typing a hashtag # and any word from the name of the macro.
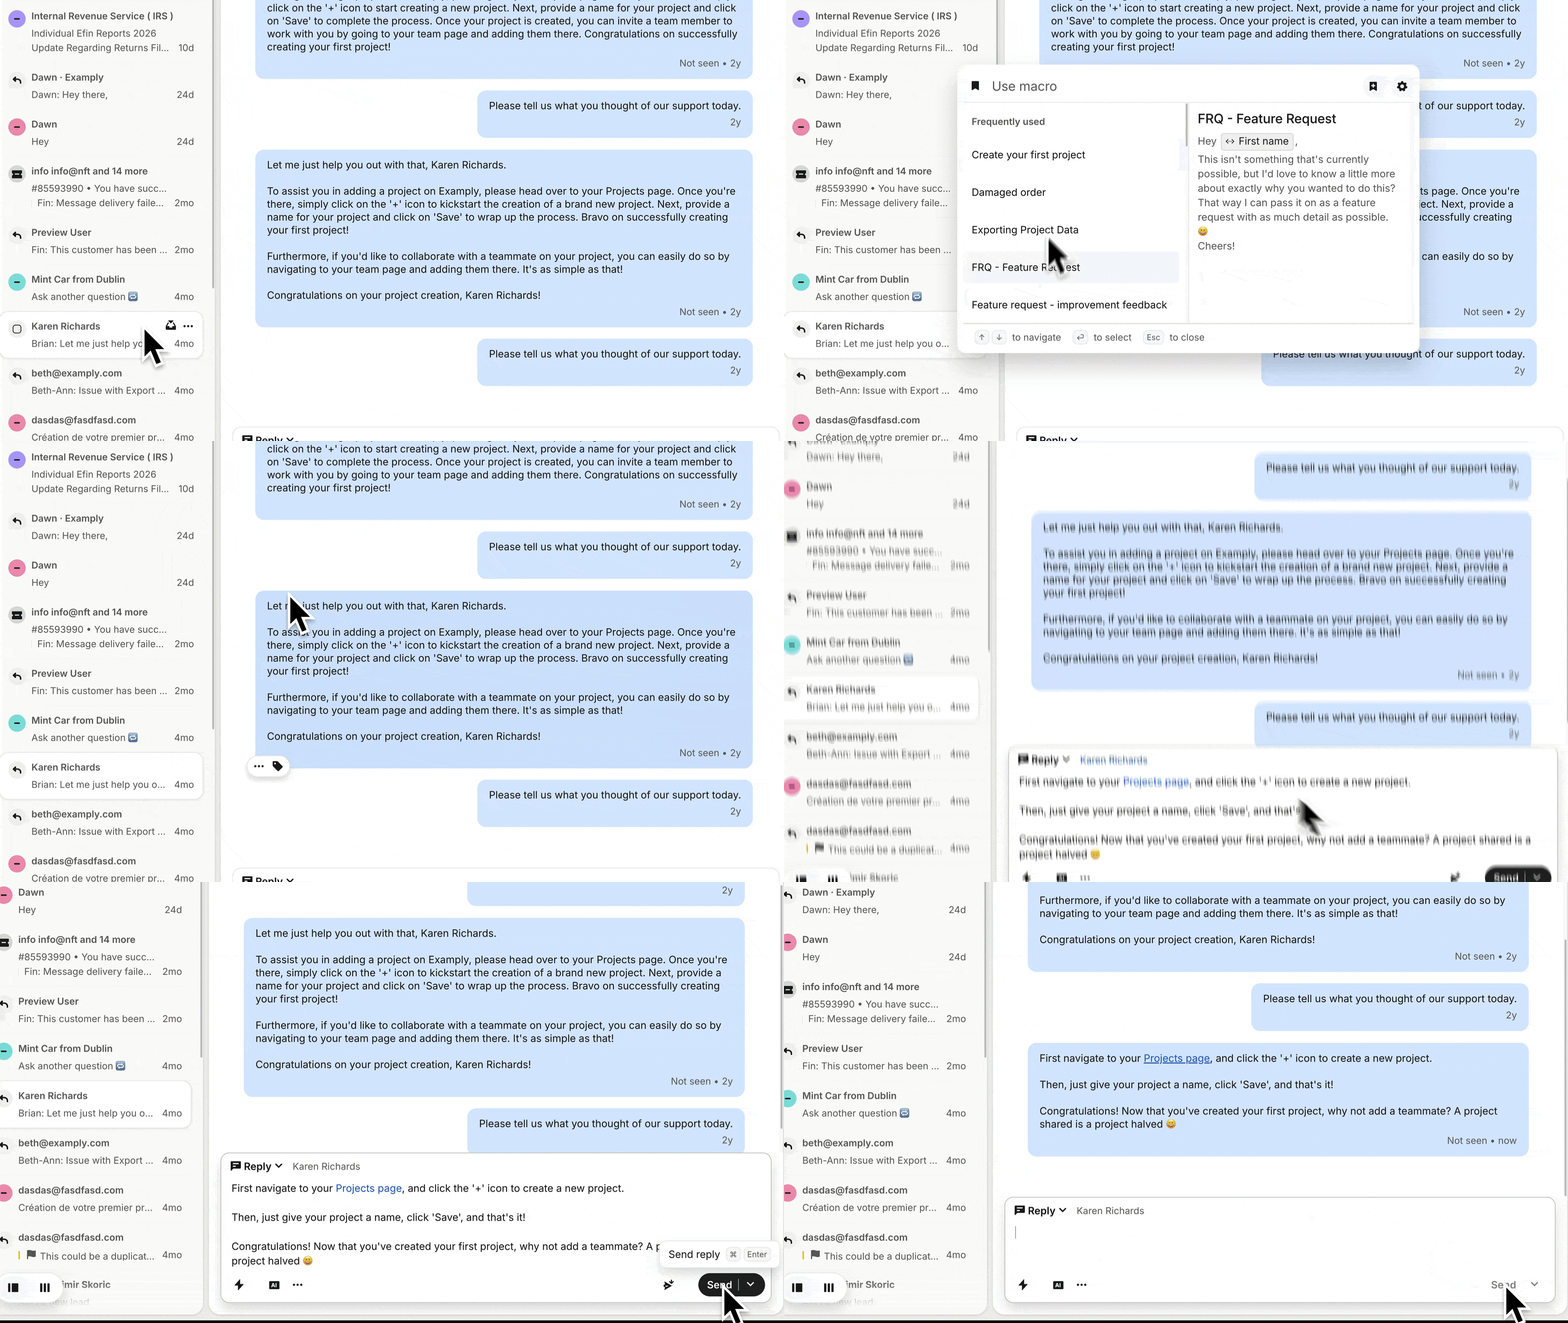
Tickets and macros are your post-handoff infrastructure. You’ve learned when to escalate from a conversation to a ticket, how to set up your ticket types, and how to build a macro library grounded in your real escalation patterns.
Resources
- Tickets explained
- Creating and managing macros
- Macro examples and best practices
- Import from Zendesk
