Write your first procedure
Build a real procedure from trigger to resolution.
Let’s build a real procedure step by step, from trigger to resolution, and explore practical techniques for writing clear, reliable instructions.
Prerequisites
To get the most from this lesson, make sure the following are in place.
- Fin deployed: Ensure Fin is live and handling customer conversations. 👉 Get everything you need in the Launch Fin course.
- Understand the procedure builder: Familiarise yourself with how procedures work and the tools available.
👉 Take the lesson - A mapped process: Have a process mapped out and ready to translate into a procedure.
👉 Take the lesson - Data connectors set up: If your procedure needs data from external systems, have the relevant connectors ready.
👉 Take the lesson
Video transcript
In this lesson we're gonna build part of a procedure together. Let's pretend that we're a physiotherapy clinic. One of the most common questions that takes up a lot of our time is customers asking to update or cancel their booking. We want to automate this process. I've got a map of my procedure here and I've got an AI generated draft of it too. I'm gonna be using these as a reference and you should have your own versions of these as well. We're essentially gonna be translating these into clear steps for Fin to follow. To do that we're gonna use a trigger, some instructions, a sub procedure, some data connectors, an attribute and a couple of branches. So let's get going. First define the trigger. This tells Finn when to use the procedure. That's why examples are so useful. They tell Finn what it is meant for and what it isn't. So it only runs in the right situations. We can actually quickly test this using the preview tab. Let's ask a question that should fire the procedure and see what happens. So here we can see the conversation playing out and it looks like the procedure has triggered and if we click here to show events we can actually confirm that it has. Honestly preview is one of those features that you just can't overuse. Every time you add something meaningful on the left, test it out on the right. It only takes a few seconds and it's gonna save you a lot of backtracking. So let's start building. The first thing this procedure needs to do is verify who the customer is. So we'll add a step that asks for their name and email address and then we'll use that email to call a data connector. In this case it's one that looks up their bookings. This is how Fin pulls in real data from an external system and now that we've called it Fin has access to all the data it contains so there's no need to call it again. Now we need to handle what happens if Finn can't verify their identity. So we'll add a condition here. If the data connector returns false, Finn lets the customer know that it couldn't verify them and hands the conversation off to the team. Now this section is already starting to look a bit busy. To keep things tidy, let's group it into a sub procedure. To do this, let's cut the steps, create a new sub procedure and give it a name, Paste those steps in and then run that sub procedure as a new first step. Now the main flow is clean and easy to follow. Okay. Next, tell Fin to show the customer a list of their upcoming appointments and ask them to confirm which one they wanna update. Now one of the best things about procedures is being able to write in natural language like this. It just makes them really easy to use. But let's pause for a second because how you write these steps really matters. You should think of it like a dial. On one end, if you're too vague, that leaves too much open to interpretation. Finn has to guess what you actually want to do. And on the other end, if you're overly specific, you're essentially trying to control every word Finn says and the more rigid your instruction the more brittle and likely to break it becomes. What you're aiming for is somewhere in the middle. Clear enough so that Fin knows what to do and flexible enough that it can handle the conversation naturally. So keep this dial in mind when you're writing because it's gonna save you a lot of trouble. At this point, I'd like to use the preview again to make sure what we've built so far is working. And yes, I can see the appointments are coming in here so that looks good. On to the next part. So we've asked the customer what they want to do. Now we need to create different experiences depending on what they say. For this, we're gonna use a condition block. You'll notice here we're just using natural language. If the customer wants to reschedule, they go down this path. If they want to cancel, they go here. And if it's neither we hand off to the team. Let's start with the reschedule path. First, we'll call a different data connector to pull in the next five available slots and show them to the customer. Then ask which one they'd like to move to, And before we make the change, we'll confirm that's what they want by showing them the original appointment, the new time they picked, and asking them to reconfirm. Then we update the booking through another data connector and confirm the change once it's been made. As for the cancel path, first we'll ask why they wanna cancel and store that as a conversation attribute. This isn't strictly necessary for the flow but it's useful data for your team. And then it's the same idea again, confirm the booking, confirm they definitely wanna cancel, and then actually cancel through another data connector before finally confirming that it's been done. And for the else path, we'll hand it off to the team. For this we'll use the hand off action, setting it to the right team or teammate. I'm also gonna add a note here which I can customize. So when the conversation lands with a teammate, they've got full context. And then lastly, we'll end the procedure with an end action. You can customize this too, setting the conversation state, adding a closing message, whatever you want. Now at this point, I'd normally jump into the preview and test both of those paths making sure the reschedule one works from end to end and then doing the same for the cancel, but I'm gonna skip that here because I think you're getting the idea that you do need to test as you build. Two things I do wanna draw your attention to though relate to the condition block. You may have noticed that they follow a similar pattern. Get details, confirm before acting, take the action and then confirm when it's done. This is a really good structure to follow for any procedure that's making changes on a customer's behalf. The other thing is now that we've built these paths out we can actually take it a step further and turn each one into its own sub procedure. So reschedule becomes one block, cancel becomes another, and suddenly your main flow becomes super easy to read. Right now this is a fairly short procedure so this might not feel necessary, but procedures grow. You're gonna be adding extra edge cases, extra steps, new checks, and when this happens having things broken into self contained blocks means you can go in and change one thing without worrying about breaking something else. Okay. One last thing and I think this actually might be one of the most underrated features in the builder, there's a review button right here. Once you hit it, this will analyze your entire procedure and flag anything that might not work. It's a great way to catch things that you might have missed. And that's it. We've gone from having a blank procedure to having a fully working flow with a trigger, identity verification, branching paths, multiple data connectors and handoffs. If you can build this, you can pretty much build anything. In the next video, we're gonna show you how to test it at scale using simulations so you can be truly confident that it works before you go live.
Start with the trigger
Every procedure starts with a trigger — the thing that tells Fin when to use it. Adding examples to the trigger helps Fin understand what the procedure is meant for, and just as importantly, what it isn’t. This means it only fires in the right situations.
Test early: Use the Preview tab to confirm your trigger fires correctly before building anything else. Ask a question that should trigger the procedure and check the events to confirm.
Build in blocks, test as you go
Don’t build the entire procedure and then test it. Every time you add something meaningful, test it in Preview. It only takes a few seconds and saves a lot of backtracking.
A good approach is to build in logical blocks:
- Identity verification — gather the customer’s details and call a data connector to look them up. Add a condition to handle what happens if the lookup fails.
- Present information — show the customer their relevant data (e.g. upcoming appointments) and ask them to confirm which one.
- Branch on intent — ask what they want to do and branch accordingly (e.g. update, cancel, or hand off if the request doesn’t match either path).
- Execute and confirm — carry out the action and confirm the result.
Use sub-procedures to stay organised
As soon as a section starts to look busy, group it into a sub-procedure. Cut the steps, create a new sub-procedure with a clear name, paste the steps in, and call it from the main flow.
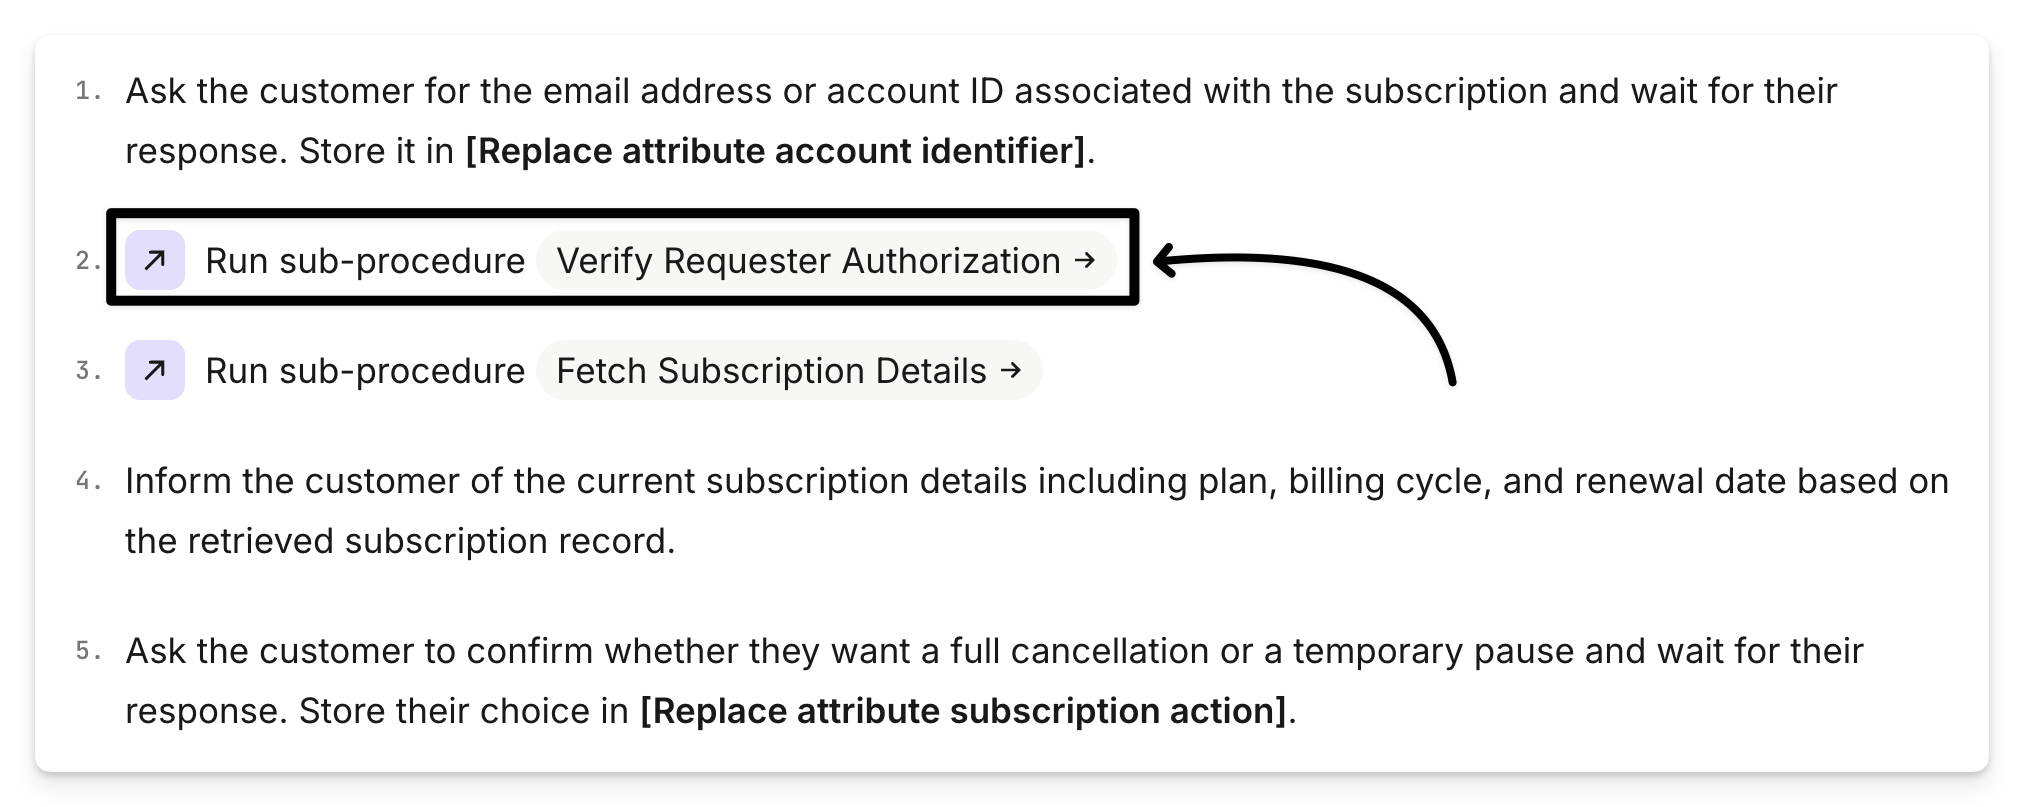
This keeps your main procedure clean and readable. It also makes debugging easier so you can focus on one block at a time without worrying about the rest. And if you need the same steps elsewhere, you can reuse the sub-procedure instead of rebuilding them.
Writing steps: find the right level of detail
How you write your steps matters. Give Fin a clear objective and enough context to act on, but don’t try to script the exact words. The more rigid the instruction, the more fragile it becomes.
Before you finish
Once your procedure is complete, run through these final checks:
- Full Preview test: Run the entire flow from trigger to resolution. Check that every branch works and edge cases are handled.
- AI review: Use the built-in AI review to catch unclear steps or gaps you might have missed.
- Iterate: You don’t need to get this perfect first time. Build it, test it, and improve it based on what you see in practice.
